Highlight
Data factory is currently go-to service for data load and transformation processes in Azure. In this article a common scenario of refreshing models in Azure Analysis Services will be implemented using ADF components including a comparison with the same process using Azure Logic Apps.
Intro
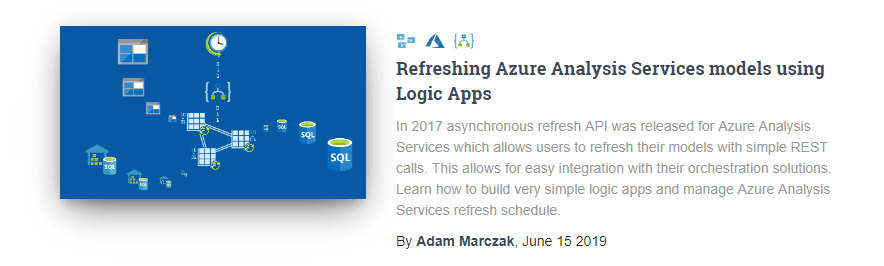
Immediately after posting my previous post about refreshing analysis services a colleague of mine asked me a very good question. Is it better to use logic apps or data factory for this process? This is a great question, so this article will focus on implementing exactly same scenario using Data Factory and finding out which of the two services could be called recommended.
Design
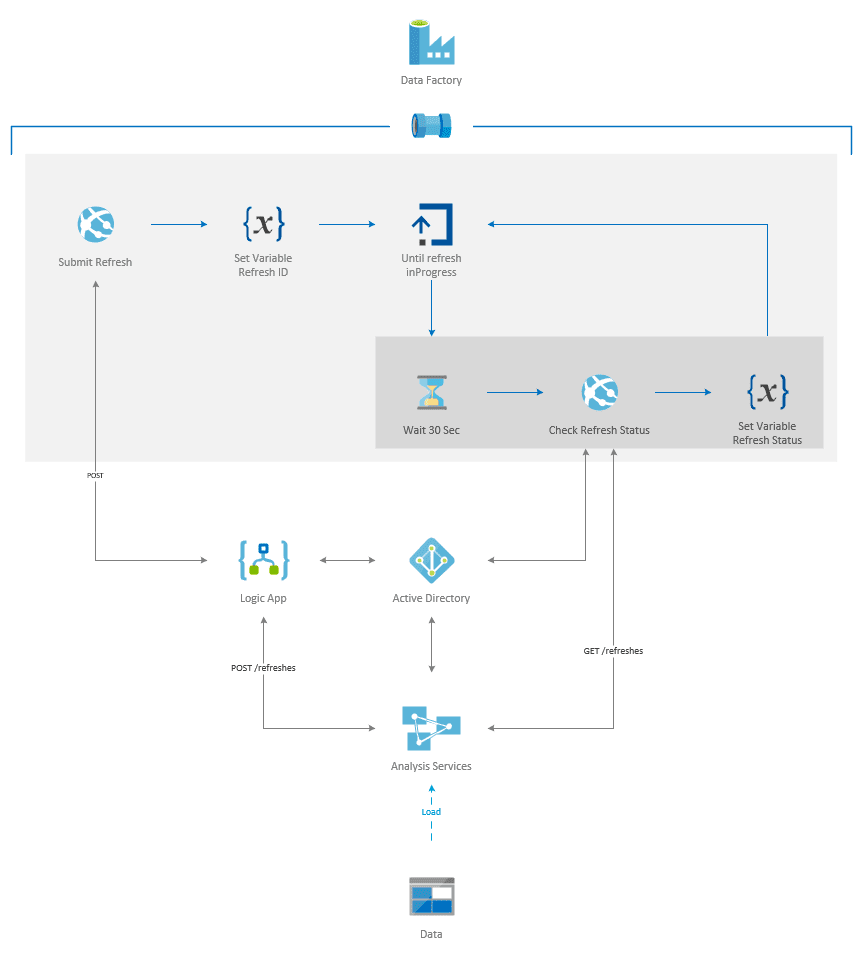
The design is fairly simple. Using Data Factory pipeline an Analysis Services API will be called to submit the refresh. Unfortunately, a logic app must be added to avoid few limitations of Data Factory. Read further to find out why.
Provisioning
Log into Azure Portal and start creating resources.
Resources
Data Factory
- Click on “+” sign to create new resource
![]()
- Type in data factory in Search window and press enter
![]()
- Click Create button
![]()
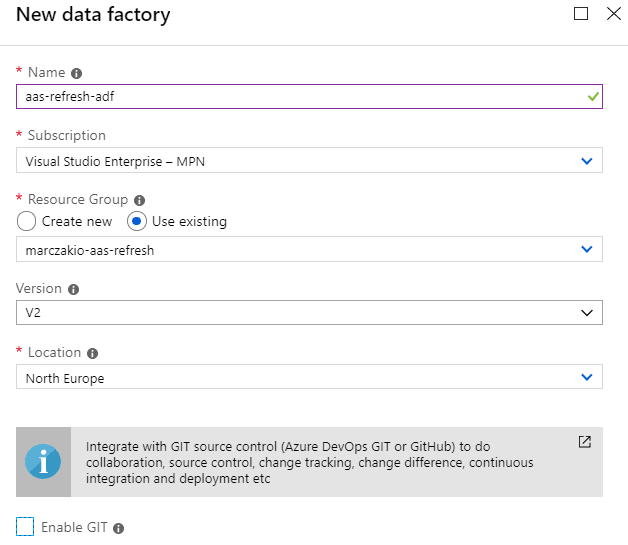
- Fill in basic info, name and location and lave V2 as version. V1 is very outdated and is completely different product. Disable GIT integration.
![]()

Logic App
- Click on “+” sign to create new resource
- Type in logic app in Search window and press enter
- Click Create button
![]()
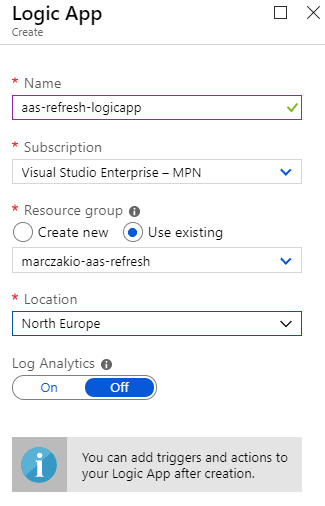
- Fill in basic info, name and location.
![]()
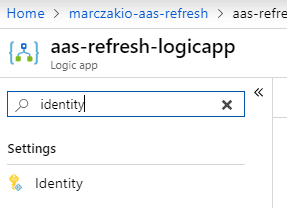
- After provisioning finished go to new logic app and search for Identity panel
![]()
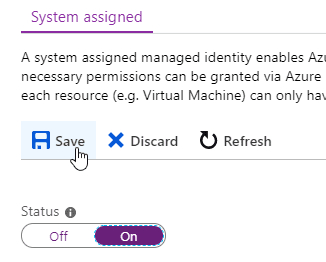
- Enable managed identity by clicking on On and selecting Save button. This sets up an application account for logic app which can be used in future steps to authenticate to Analysis Services.
![]()
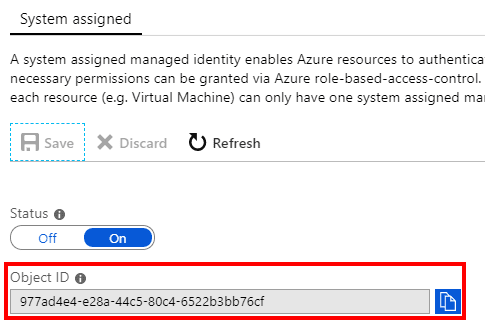
- Copy Object ID from screen after creation.
![]()
Privilege setup
When data factory creation is finished, Azure also sets up something called managed service identity (MSI). This identity can be used to authenticate to resources. Managed identity is a great way to secure connection with various resources in azure without a need to create KeyVault or manage passwords. For Logic App this had to be manually enabled.
Next step is to find logic app and data factory application IDs which are required to add their account to analysis services as admins. This is because currently administrative privileges are required to perform refreshes.
Finding Managed Identities Application IDs
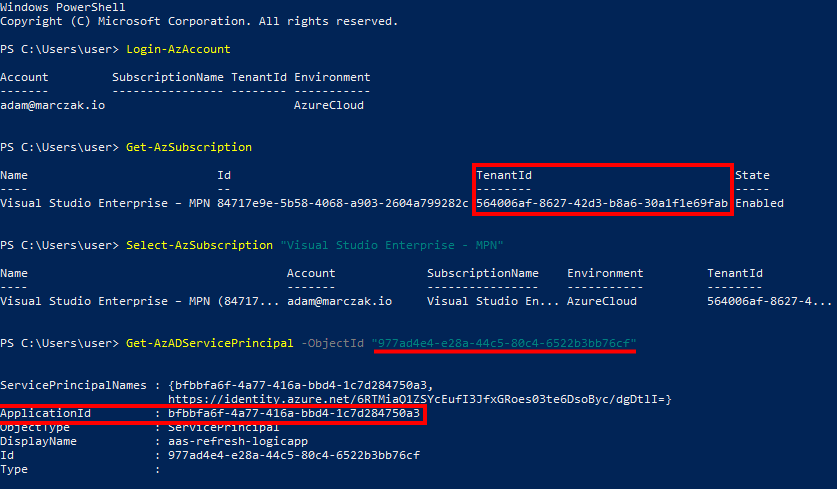
- Open PowerShell window.
- Find managed identity. This can’t be done via portal because managed identities don’t have app registration attached to them. Therefore, a PowerShell or CLI must be used. In PowerShell this can this can be done using many cmdlets but two recommended are searching by either Object ID or by name
- To search by Object ID a following command must be executed
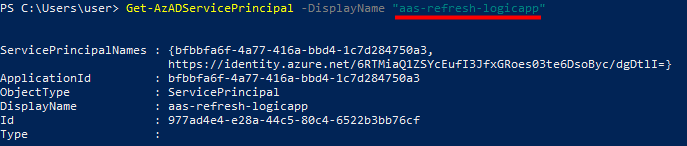
Get-AzADServicePrincipal -ObjectID "<object id>" - To search by Name a following command must be executed. Note that name of managed identity is always the same as the resource. Since some resources do not require unique names it is possible to have multiple managed identities with the same name, so this is not recommended way for production scripts.
Get-AzADServicePrincipal -DisplayName "<name of azure resource>" - Run following script
 Connect-AzAccount
 Get-AzSubscription
 Select-AzSubscription "<name of subscription you are working on>"
 Get-AzADServicePrincipal -ObjectID "<object id of logic app>"
Alternatively, you can search by logic app name![]() From the output of this script two things should be saved
From the output of this script two things should be saved![]()
- TenantId - this is Directory ID of Microsoft Entra (former Azure Active Directory) where the managed identity is located
- ApplicationId - application ID of managed identity
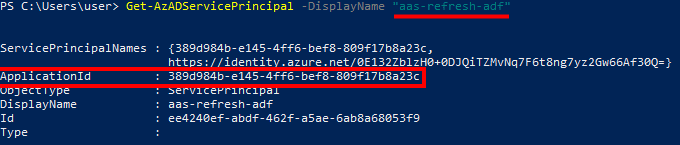
- Since Data Factory doesn’t give out right Object ID of its identity the simplest way is to find it by azure resource name. In the same PowerShell window run command to find application ID of data factory identity.
Get-AzADServicePrincipal -DisplayName "<name of data factory>"![]()
Adding Administrative Privileges
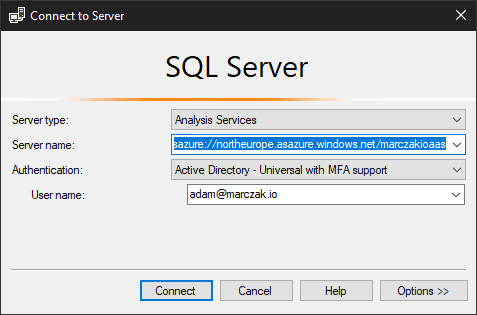
- Open SQL Server Management Studio
- Connect to Analysis Services
![]()
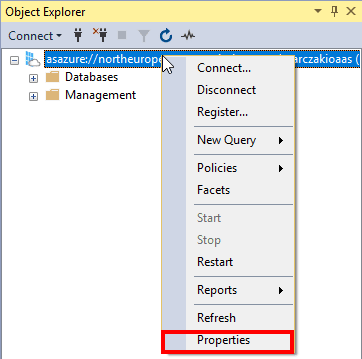
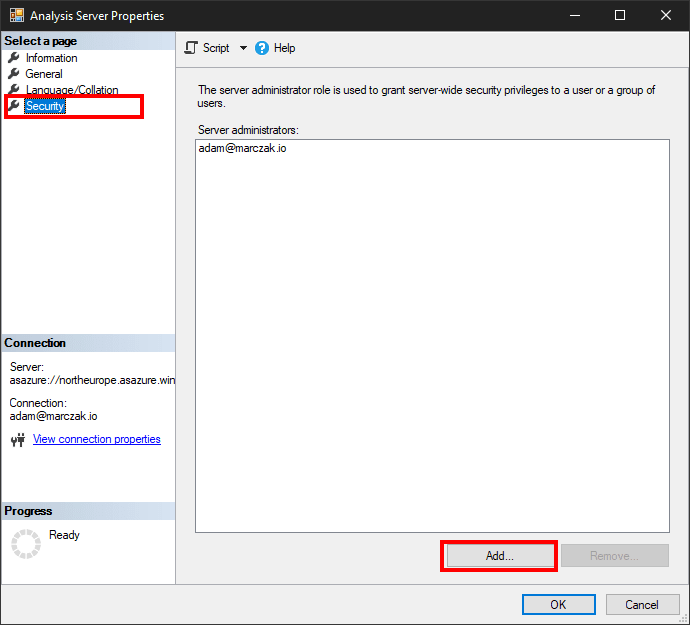
- Right-click on server and select Properties
![]()
- Go to Security page and click Add button
![]()
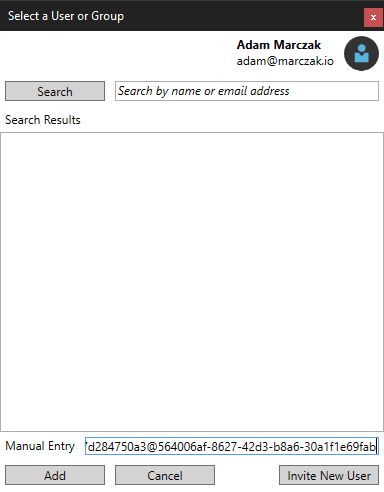
- Search for app by name given in previous step or add manual entry in following convention
Convention IS
![]() For example
For exampleapp:<application_id>@<tenant_id>app:df1b8569-352d-4be0-acf3-847a2e72aee0@564006af-8627-42d3-b8a6-30a1f1e69fab - Click Add
![]()
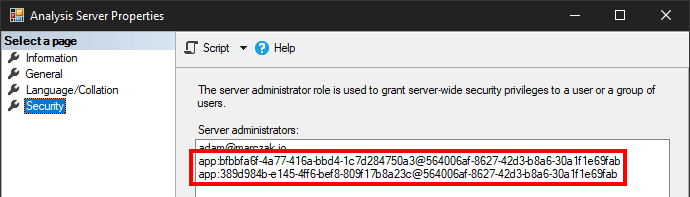
- Ensure to add both logic app and data factory application ids
Creating ADF flow
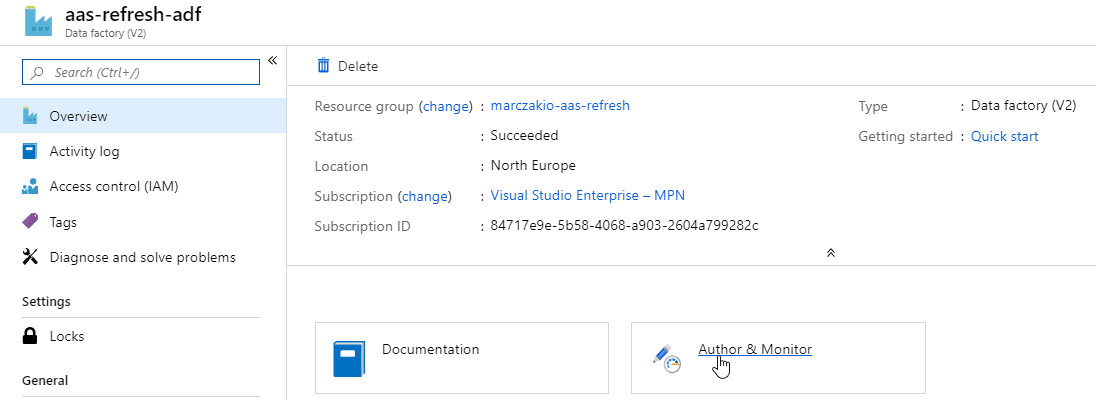
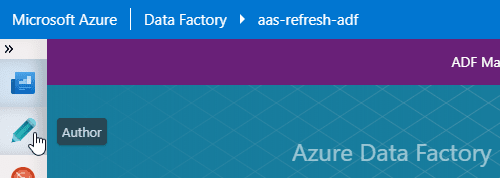
- Navigate to Data Factory and click on Author and Monitor
![]()
- In Data Factory web editor and click on Author button
![]()
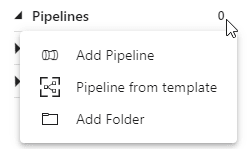
- Click … in Pipelines section and select Add pipeline from the dropdown menu
![]()
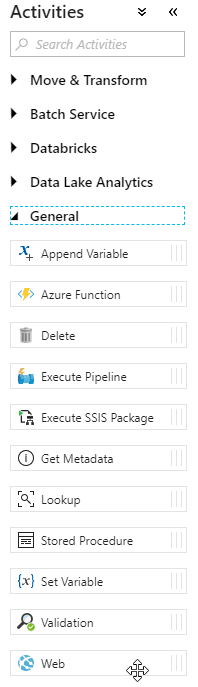
- Expand General section from the Activities panel and find Web activity
![]()
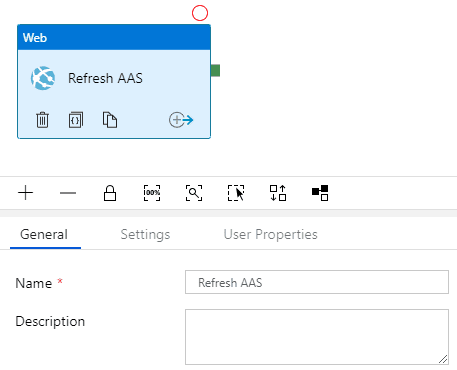
- Drag and drop Web activity into drawing pane and name it Refresh AAS
![]()
This is important
Because of how Web activity in ADF works, it impossible to make proper call to Analysis Services refresh API.
- First of all, Analysis Services refresh API will return 202 (Accepted) response when submitting request. Web activity is built in a way that upon receiving 202 response it will keep sending requests to the same endpoint until final (200, 400, etc.) response is received. This means when 202 is received, ADF will make another call and next call will return 200 (OK) response with body claiming that refresh status is in progress. This is a BIG deal because only first response (202) returns refresh ID in the headers. This means, this information is lost.
- Secondly, currently neither Web Activity output not object itself contain Headers information for the response. Even in case of synchronous request it would be impossible to get refresh ID since it is located in response header called Location.
Because of those two imperfections it is required to use either Azure Function or Azure Logic App to make the first call and return header in the object. The fastest is to make Logic App so, next step is to use logic app.
Creating Logic App helper function
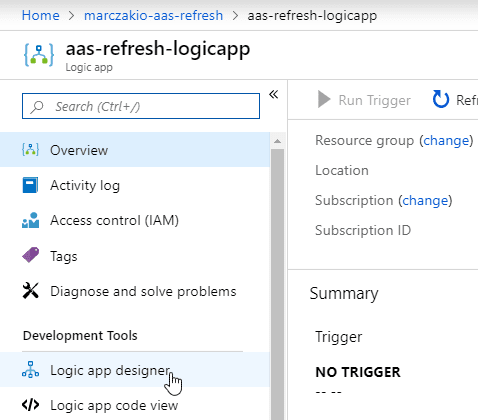
- Navigate to Logic App and click on Designer
![]()
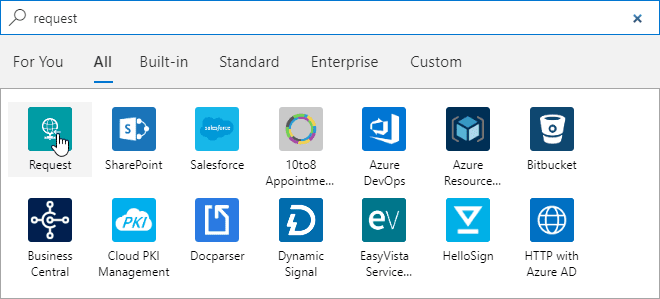
- Start from blank application and search for request action group
![]()
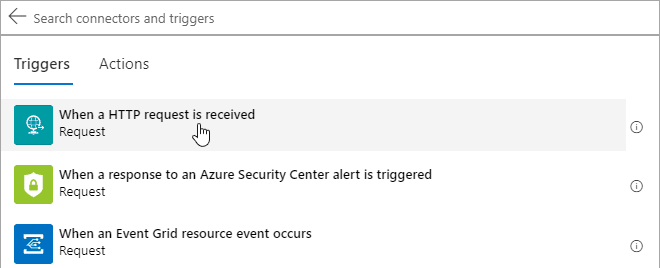
- Select When a HTTP request is received action
![]()
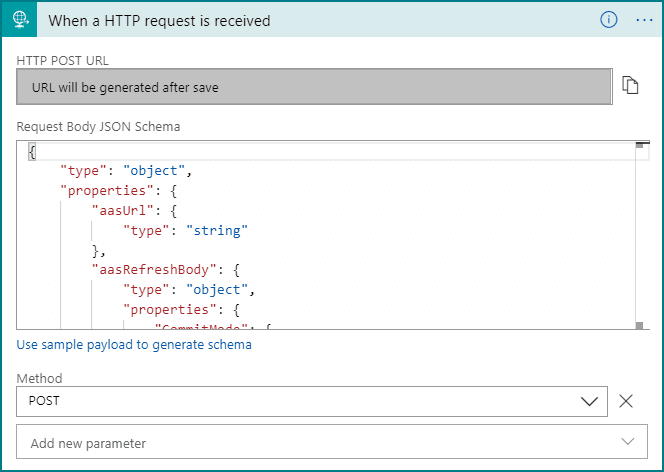
- Configure Action
![]()
- Change Schema - aasRefreshBody will be exact request body passed to Analysis Services and aasUrl will be URL of Analysis Services refresh API
{ "properties": { "aasRefreshBody": { "properties": { "CommitMode": { "type": "string" }, "MaxParallelism": { "type": "integer" }, "Objects": { "type": "array" }, "RetryCount": { "type": "integer" }, "Type": { "type": "string" } }, "type": "object" }, "aasUrl": { "type": "string" } }, "type": "object" } - Change method to POST
- Add new action
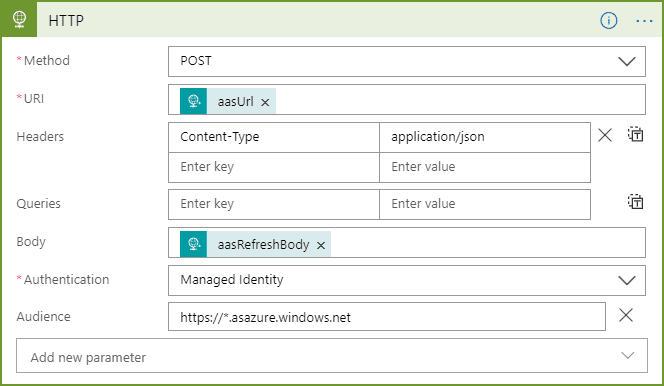
- Search for HTTP call and configure it as follows
![]()
- URI aasUrl - output from request trigger
- Headers Content-Type: application/json
- Body aasRefreshBody - output from request trigger
- Authentication Managed Identity - this is the identity which was set up for logic app during provisioning steps
- Audience https://*.asazure.windows.net - this is token audience which is required by AAS for request to be authorized
- Change settings for HTTP action
![]()
- Un-select Asynchronous Pattern setting
![]()
- Add new action
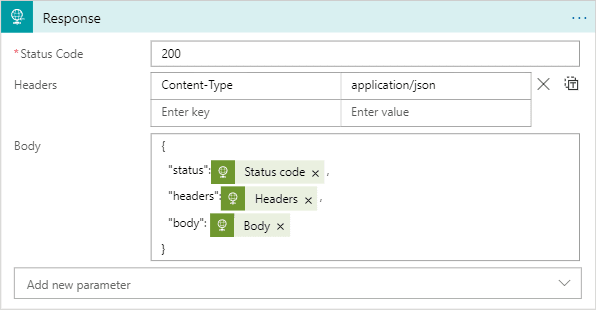
- Search for Response action and configure it as follows
![]()
- Status Code 200 - for ADF to accept this as success
- Body aasRefreshBody - output from request trigger, Status Code from AAS refresh call should not be passed here
- Headers Content-Type: application/json
- Body status - Status Code from AAS refresh call in case needed in future for error handling, headers for location header which is refresh id, body response info from refresh call
{
  "body": @{body('HTTP')},
  "headers": @{outputs('HTTP')['headers']},
  "status": @{outputs('HTTP')['statusCode']}
}


Continue building ADF flow
Now that helper function is done ADF can call it to refresh AAS.
- Configure Web activity
![]()
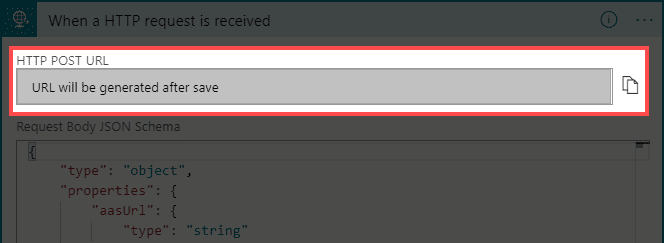
- URL - copy this from Logic App HTTP POST URL field after saving Logic App
![]()
- Method - POST
- Headers - Content-Type application/json
- Body
For more details on the properties check my previous article.
{ "aasUrl":"https://<rollout_region>.asazure.windows.net/servers/<analysis_services_name>/models/<analysis_services_model_name>/refreshes", "aasRefreshBody":{ "CommitMode":"transactional", "MaxParallelism":2, "Objects":[], "RetryCount":2, "Type":"Full" } } - Everything else is default.
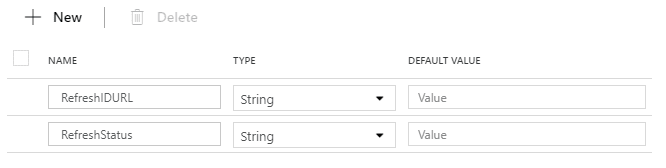
- Create two pipeline variables called RefreshIDURL and RefreshStatus
![]()
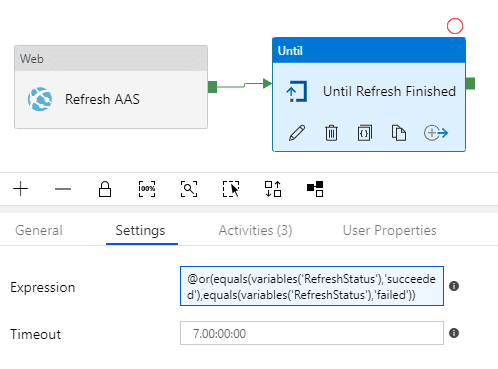
- Add new action Until
And configure exit loop condition as follows
![]()
@or(equals(variables('RefreshStatus'),'succeeded'),equals(variables('RefreshStatus'),'failed')) - Double click on Until loop action and add Wait, Web and Set Variable Actions action and link the together
![]()
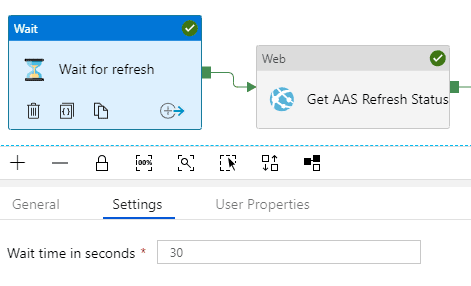
- Configure Wait Action to wait 30 seconds between tries
![]()
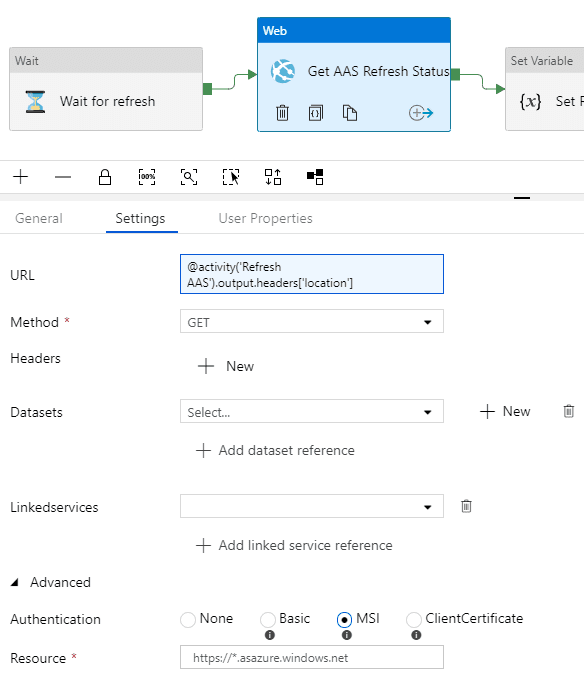
- Configure Web Action to wait 30 seconds between tries
Configure URL as per sample blow, resource as https://*.asazure.windows.net, Authentication as MSI. Thanks to previous setup ADF can authenticate and authorize connection to AAS as admin.
![]()
@activity('Refresh AAS').output.headers['location'] - Configure Wait Action to wait 30 seconds between tries
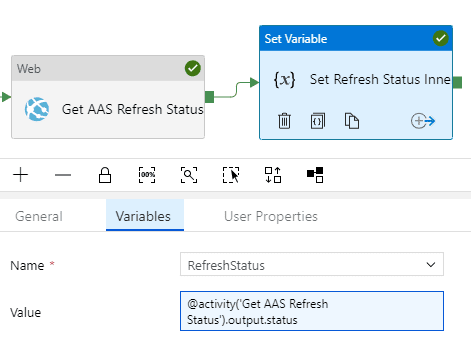
And configure Value it as follows
![]()
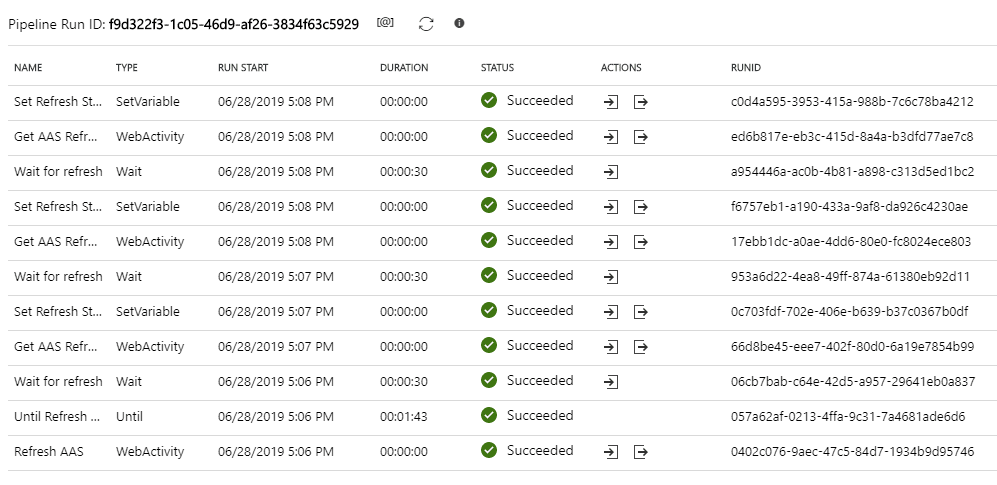
@activity('Get AAS Refresh Status').output.status - Hit Debug and watch for execution steps
![]()


Conclusions
Implementing Analysis Services refresh scenario using both Logic Apps and Data Factory was a fun challenge. It definitely was a good learning opportunity and in general allowed me to better understand their strength.
In short summary what I learned was.
Ease of implementation
Logic apps are much more flexible than data factory. It was possible to implement entire solution without any workarounds. In case of data factory there was no way to avoid using Logic Apps or Functions as workaround. Logic apps are clear winner here.
Logic Apps are better than Data Factory
Cost Effectiveness
Because Data Factory lends integration runtime for execution time a wait actions extends the hold of this resource. Because of lack of this release implementations that wait for events are much more expensive using Data Factory.
Below diagram shows 1 week costs of running both solutions on schedule to refresh AAS every hour. Refresh took about 2 minutes.
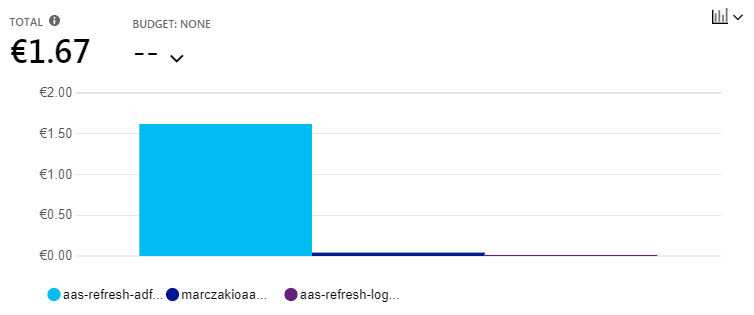
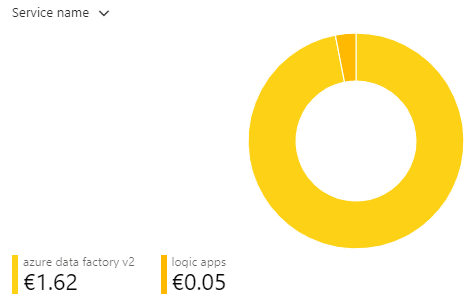
For larger solutions logic apps is clear winner.
Logic Apps are better than Data Factory
Extensibility
This is a tie. Both Logic Apps and Data Factory allow for remote executions and mixing with other processes. This means they can be integrated with pretty much any solution out there.
Logic Apps are as good as Data Factory
Which means my end result
Azure Logic Apps are superior choice for this scenario
Next Steps
If you enjoyed this article you might want to check how to implement this scenario using Azure Logic Apps.


