
Highlight
Single Page Applications are one of the best experiences that a web developer can deliver to their customers. See how to build SPA using Vue.js with .NET Core 2.0 backend.
What is SPA?
Web applications built using classical approach use post/get and redirect to navigate through application. This can be decent experience for the users but it is not always enjoyable as it depends on the use case of the application. With this approach every button click, every change in data, every action causes entire page to be refreshed and rendered to user. Now imagine using a web mailbox application where email list doesn’t refresh until you refresh the page, or new emails make your page refresh every time. That’s not the best experience user can get.
A SPA stands for Single Page Application which by being simplistic means that a web page only refreshes partially. Single page applications solve all mentioned issues and deliver unmatched experience to their users. Presented case of web mailbox is one of the best examples of modern SPA approach. Whenever a new email comes only the list of emails refreshes which doesn’t disturb the user current actions.
What is Vue.js?
Vue.js is one of many libraries on the market created for building single page applications using JavaScript. A big advantage of it is that it was built with being lightweight in mind. This library also does not require much time investment to learn. Developer can create first applications in just minutes.
Prerequisites
- .NET Core 2.0 SDK
- Visual Studio Code
- C# Extension
- Vetur Extension
- VSCode Icons Extension - Not required but makes everything look nice
- NodeJS version 8.9.4
Building the template
Now that prerequisites are met a project can be initialized.
- Open terminal and initialize the project. For this demo MVC .NET Core template will be used. Remember to replace MarczakIO.VueSPA.Web with name of for the project.
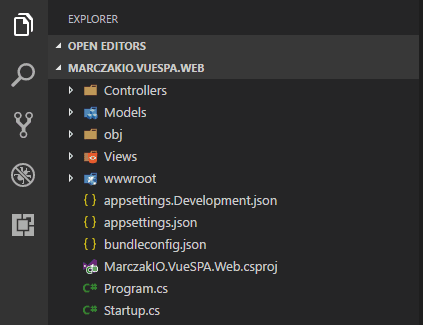
This should bring up Visual Studio Code with initialized template
cd E:\ mkdir MarczakIO.VueSPA.Web cd MarczakIO.VueSPA.Web dotnet new mvc code .![]()
- Configure Startup.cs for Web Pack & SPA fallback routes.
using System; using System.Collections.Generic; using System.Linq; using System.Threading.Tasks; using Microsoft.AspNetCore.Builder; using Microsoft.AspNetCore.Hosting; using Microsoft.Extensions.Configuration; using Microsoft.Extensions.DependencyInjection; using Microsoft.AspNetCore.SpaServices.Webpack; namespace MarczakIO.VueSPA.Web { public class Startup { public Startup(IConfiguration configuration) { Configuration = configuration; } public IConfiguration Configuration { get; } public void ConfigureServices(IServiceCollection services) { services.AddMvc(); } public void Configure(IApplicationBuilder app, IHostingEnvironment env) { if (env.IsDevelopment()) { app.UseDeveloperExceptionPage(); app.UseWebpackDevMiddleware(new WebpackDevMiddlewareOptions { HotModuleReplacement = true }); } else { app.UseExceptionHandler("/Home/Error"); } app.UseStaticFiles(); app.UseMvc(routes => { routes.MapRoute( name: "default", template: "{controller=Home}/{action=Index}/{id?}"); routes.MapSpaFallbackRoute( name: "spa-fallback", defaults: new { controller = "Home", action = "Index" }); }); } } } - This makes so that WebPack will replace files automatically when editing them in the editor using Hot Module Replacement and,
- Whenever no controller path is met a route will be redirected back to Home/Index so that application can use native URLs https://myserver.com/MyApp/MyView/MyAction instead of hashbang navigation https://myserver.com/#!/MyApp/MyView/MyAction. It is still required to disable hashbang navigation which is enabled by default, check next point for that.
- Add webpack configuration file to root catalog called webpack.config.js. This file is responsible for configuring how will webpack compile javascript, vue, scss, css and other files into project bundle. Once created paste in the contents.
var path = require('path') var webpack = require('webpack') const bundleOutputDir = './wwwroot/dist'; module.exports = { context: __dirname, entry: { main: './App/index.js' }, module: { rules: [ { test: /\.css$/, use: [ 'vue-style-loader', 'css-loader' ], }, { test: /\.vue$/, loader: 'vue-loader', options: { loaders: { 'scss': [ 'vue-style-loader', 'css-loader', 'sass-loader' ], 'sass': [ 'vue-style-loader', 'css-loader', 'sass-loader?indentedSyntax' ] } } }, { test: /\.js$/, loader: 'babel-loader', exclude: /node_modules/ }, { test: /\.(png|jpg|gif|svg)$/, loader: 'file-loader', options: { name: '[name].[ext]?[hash]' } } ] }, resolve: { alias: { 'vue$': 'vue/dist/vue.esm.js' }, extensions: ['*', '.js', '.vue', '.json'] }, devServer: { historyApiFallback: true, noInfo: true, overlay: true }, performance: { hints: false },output: { path: path.join(__dirname, bundleOutputDir), filename: '[name].js', publicPath: 'dist/' }, devtool: '#eval-source-map' } if (process.env.NODE_ENV === 'production') { module.exports.devtool = '#source-map' module.exports.plugins = (module.exports.plugins || []).concat([ new webpack.DefinePlugin({ 'process.env': { NODE_ENV: '"production"' } }), new webpack.optimize.UglifyJsPlugin({ sourceMap: true, compress: { warnings: false } }), new webpack.LoaderOptionsPlugin({ minimize: true }) ]) } - Line 3 defines where all the bunding output should be. In case of ASP.NET it should always go to wwwroot but the rest is optional.
const bundleOutputDir = './wwwroot/dist'; - Line 7 defines where to look for the root of the application. Note that this is project path inside of workspace directory.
entry: { main: './App/index.js' }, - Add .babelrc in the root directory to configure babel engine for JavaScript
{ "presets": [ ["env", { "modules": false }], "stage-3" ] } - Add package.json in the root directory to configure NPM node packages
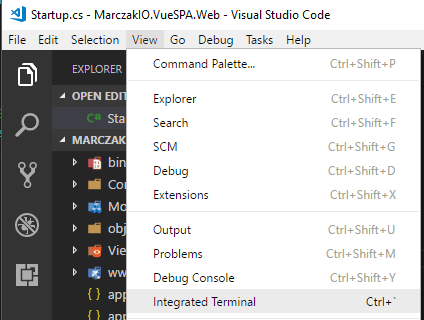
{ "name": "lingaro.office.planner", "private": true, "version": "0.0.0", "devDependencies": { "@types/webpack-env": "^1.13.5", "aspnet-webpack": "^2.0.3", "babel-plugin-transform-object-rest-spread": "^6.26.0", "css-loader": "^0.25.0", "event-source-polyfill": "^0.0.7", "extract-text-webpack-plugin": "^2.1.2", "file-loader": "^0.9.0", "isomorphic-fetch": "^2.2.1", "jquery": "^3.3.1", "node-sass": "^4.5.3", "sass-loader": "^6.0.6", "style-loader": "^0.13.1", "url-loader": "^0.5.7", "webpack": "^2.7.0", "webpack-hot-middleware": "^2.21.0" }, "dependencies": { "babel-core": "^6.26.0", "babel-loader": "^7.1.2", "babel-polyfill": "^6.26.0", "babel-preset-env": "^1.6.1", "babel-preset-stage-3": "^6.24.1", "vue": "^2.5.13", "vue-loader": "^14.0.3", "vue-router": "^3.0.1", "vue-template-compiler": "^2.5.13" }, "browserslist": [ "> 1%", "last 2 versions", "not ie <= 8" ] } - Open Terminal by clicking View > Integrated Terminal or hitting Ctrl+`
![]()
- Execute dotnet restore command in the terminal to restore missing .NET packages
![]()
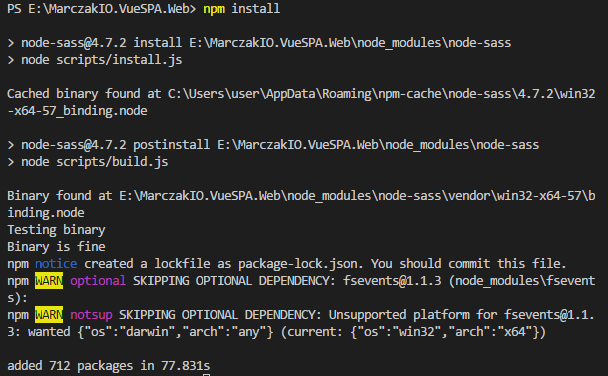
- Execute npm install command in the terminal to restore missing Node modules
![]()
- Modify the _Layout.cshtml view in Views/Shared catalog
<!DOCTYPE html> <html> <head> <meta charset="utf-8" /> <meta name="viewport" content="width=device-width, initial-scale=1.0" /> <title>@ViewData["Title"] - Lingaro.OfficePlanner.Web</title> <base href="~/" /> </head> <body> @RenderBody() @RenderSection("scripts", required: false) </body> </html> - Modify the Index.cshtml view in Views/Home catalog
<!DOCTYPE html> @{ ViewData["Title"] = "Home Page"; } <div id='app'>Loading...</div> @section scripts { <script src="~/dist/main.js" asp-append-version="true"></script> } - Add App folder in root directory and create following files
- Create index.js, this is the main root file for SPA application which webpack will build on. It is worth noting that the parameter mod on VueRouter is setting it to history which means it disables hashbang navigation.
import Vue from 'vue' import VueRouter from 'vue-router' import App from './App.vue' Vue.config.productionTip = false Vue.use(VueRouter) const routes = [ { path: '/', component: App } ] const router = new VueRouter({ routes, mode: 'history' }) new Vue({ el: '#app', template: "<div><router-view></router-view></div>", router }) - Create App.vue. With vetur extension all code will be properly highlighted for those files.
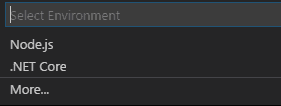
<template> <div id="home"> <h1>Hello World!</h1> </div> </template> <script> export default { } </script> <style lang="scss"> </style> - Press F5 and see first SPA app template working. On the first execution VS Code will ask what environment to start the app in, in which case choose .NET Core.

To summarize what has been done
- A standard MVC .NET core application was created using MVC template to initialize the project
- WebPack has been initialized so that it compiles and reloads .vue, .js, .css files for SPA application
- Babel was initialized to that newest ES2015 standards can be used within javascript
- .NET routes were defined so that SPA can use native URL navigation instead of hashbang (index.js enabled this setting)
Building the App
Now that the backbone is hooked up a real application can be coded. Even if application returns “Hello World”, there are already few things in place like routing using vue-router, components, scss loaders etc. that allows quick development.
Working with styles using SCSS and variables
Very often developers want to bundle CSS together inside of some main file like main.css which of course had its advantages like allowing external files to be moved to CDN but for small applications this is often not required. Below section presents how to add CSS quickly to components and allow webpack handle the rest.
- Create variables.scss file inside of App folder
$vue-blue: #32485F; $vue-green: #00C185; - Modify App.vue file with new styles
And the result is presented below
<template> <div id="home"> <h1>Hello World!</h1> </div> </template> <script> export default { } </script> <style lang="scss"> @import './variables.scss'; #home { max-width: 400px; margin: 0 auto; line-height: 1.4; font-family: 'Avenir', Arial, Arial, sans-serif; -webkit-font-smoothing: antialiased; -moz-osx-font-smoothing: grayscale; color: $vue-blue; } h1 { text-align: center; } </style>![]()

Adding components and routes
Creating components is the main reason why this tutorial exists. Javascript SPA applications can grow in size very quickly so it’s very important to keep good separation of responsibility. Below a simple ‘To do list’ app component will be created.
- Add Components folder inside of App folder
- Add Todo folder inside of Components folder
- Add TodoList.vue file inside of Todo folder. This component will render layout for list of task and for each task will render another component called TodoListItem which will handle rendering of singular element. Again, it is all about correct separation. This might seem excessive at start but applications grow so fast in size that later this is very time consuming.
<template> <div> <BaseInputText v-model="newTodoText" placeholder="New todo item" @keydown.enter="addTodo" /> <ul v-if="todos.length"> <TodoListItem v-for="todo in todos" :key="todo.id" :todo="todo" @remove="removeTodo" /> </ul> <p v-else> Nothing left in the list. Add a new todo in the input above. </p> </div> </template> <script> import BaseInputText from './BaseInputText.vue' import TodoListItem from './TodoListItem.vue' let nextTodoId = 1 export default { components: { BaseInputText, TodoListItem }, data () { return { newTodoText: '', todos: [ { id: nextTodoId++, text: 'Learn Vue' }, { id: nextTodoId++, text: 'Learn about single-file components' }, { id: nextTodoId++, text: 'Fall in love' } ] } }, methods: { addTodo () { const trimmedText = this.newTodoText.trim() if (trimmedText) { this.todos.push({ id: nextTodoId++, text: trimmedText }) this.newTodoText = '' } }, removeTodo (idToRemove) { this.todos = this.todos.filter(todo => { return todo.id !== idToRemove }) } } } </script> - Add TodoListItem.vue file inside of Todo folder.
<template> <li> {{ todo.text }} <button @click="$emit('remove', todo.id)"> X </button> </li> </template> <script> export default { props: { todo: { type: Object, required: true } } } </script> - Add BaseInputText.vue file inside of Todo folder. This will handle users input and emit it to component above.
<template> <input type="text" class="input" :value="value" v-on="listeners" > </template> <script> export default { props: { value: { type: String, default: '', } }, computed: { listeners () { return { ...this.$listeners, input: event => this.$emit('input', event.target.value) } } } } </script> <style lang="scss" scoped> @import './App/variables.scss'; .input { width: 100%; padding: 8px 10px; border: 1px solid $vue-blue; } </style> - Modify index.js inside of App folder to add new route to component
import Vue from 'vue' import VueRouter from 'vue-router' import App from './App.vue' import TodoList from './components/Todo/TodoList.vue' Vue.config.productionTip = false Vue.use(VueRouter) const routes = [ { path: '/', component: App, children: [ { path: 'todo', component: TodoList } ] } ] const router = new VueRouter({ routes, mode: 'history' }) new Vue({ el: '#app', template: "<div><router-view></router-view></div>", router }) - Modify App.vue inside of App folder so that a button which directs to new component appears and specific place for rendeing sub components exists.
<template>
    <div id="home">
        <h1>Hello World!</h1>
        <router-link to="todo">Todo List</router-link>
        <router-view></router-view>
    </div>
</template>

<script>
export default { }
</script>

<style lang="scss">
@import './variables.scss';

#home {
    max-width: 400px;
    margin: 0 auto;
    line-height: 1.4;
    font-family: 'Avenir', Arial, Arial, sans-serif;
    -webkit-font-smoothing: antialiased;
    -moz-osx-font-smoothing: grayscale;
    color: $vue-blue;
}

h1 {
    text-align: center;
}
</style>
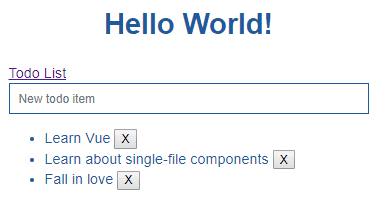
Now when page is refreshed user should see.

After clicking Todo list hyperlink user will be moved to /todo route
To summarize what has been done
- A scss was added to components and bundled with application using webpack
- New components were added and established pattern for adding new components to application
Consuming Web Api from .NET
-
Create new Web API file SampleDataController.cs inside of Controllers folder
using System; using System.Collections.Generic; using System.Linq; using System.Threading.Tasks; using Microsoft.AspNetCore.Mvc; namespace MarczakIO.VueSPA.Web.Controllers { [Route("api/[controller]")] public class SampleDataController : Controller { private static string[] Summaries = new[] { "Freezing", "Bracing", "Chilly", "Cool", "Mild", "Warm", "Balmy", "Hot" }; [HttpGet("[action]")] public IEnumerable<WeatherForecast> WeatherForecasts() { var rng = new Random(); var i = 1; return Enumerable.Range(1, 5).Select(index => new WeatherForecast { Id = i++, DateFormatted = DateTime.Now.AddDays(index).ToString("d"), TemperatureC = rng.Next(-20, 55),W Summary = Summaries[rng.Next(Summaries.Length)] }); } public class WeatherForecast { public int Id { get; set; } public string DateFormatted { get; set; } public int TemperatureC { get; set; } public string Summary { get; set; } public int TemperatureF { get { return 32 + (int)(TemperatureC / 0.5556); } } } } } -
Add new folder called Api inside of App folder
-
Add new file SampleDataAPI.js inside of Api folder
export default { getData: () => { return fetch('/api/SampleData/WeatherForecasts', { method: 'get' }).then(function (response) { return response.json(); }).then(function (response) { return response; }); } } -
Add ForecastList folder inside of Components folder
-
Add ForecastList.vue file inside of ForecastList folder
<template> <div id="app"> <h1>Check the forecasts</h1> <button v-on:click="fetchForecasts">Get Data</button> <p>Status {{ info }}.</p> <ul> <li v-for="forecast in forecasts" v-bind:key="forecast.Id"> {{ forecast.summary }} </li> </ul> </div> </template> <script> import SampleDataAPI from '../../Api/SampleDataAPI.js' import $ from 'jquery' export default { data () { return { forecasts: [], error: null, info: "Not run yet" } }, methods: { fetchForecasts() { this.info = "Fetching" SampleDataAPI .getData() .then((data) => { this.forecasts = data; this.info = "Done" }); } }, } </script> <style lang="scss"> </style> -
Modify index.js inside of App folder
import Vue from 'vue' import VueRouter from 'vue-router' import App from './App.vue' import TodoList from './components/Todo/TodoList.vue' import ForecastList from './components/ForecastList/ForecastList.vue' Vue.config.productionTip = false Vue.use(VueRouter) const routes = [ { path: '/', component: App, children: [ { path: 'todo', component: TodoList }, { path: 'forecast', component: ForecastList } ] } ] const router = new VueRouter({ routes, mode: 'history' }) new Vue({ el: '#app', template: "<div><router-view></router-view></div>", router }) -
Modify App.vue inside of App folder
<template> <div id="home"> <h1>Hello World!</h1> <router-link to="todo">Todo List</router-link> <router-link to="forecast">Forecast List</router-link> <router-view></router-view> </div> </template> <script> export default { } </script> <style lang="scss"> @import './variables.scss'; #home { max-width: 400px; margin: 0 auto; line-height: 1.4; font-family: 'Avenir', Arial, Arial, sans-serif; -webkit-font-smoothing: antialiased; -moz-osx-font-smoothing: grayscale; color: $vue-blue; } h1 { text-align: center; } </style> -
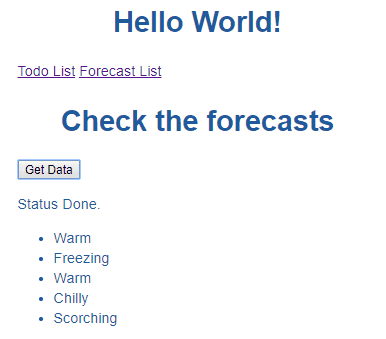
Test the app
To summarize what has been done
- Created simple Web API in .NET core which returns random forecasts
- Created simple Service API in javascript to consume this API
- Created component to display the forecasts
- Added navigation and routes for new component


